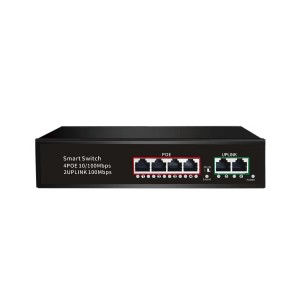
Expensive IP camera surveillance systems were initially only economically available to large companies, but now IP surveillance systems are everywhere in daily life. This is because the prices of IP cameras and PoE switches have dropped significantly, so many people are trying to build A small IP monitoring system to protect the safety of their own property. So, where can the IP camera surveillance system be used? How to deploy IP cameras using PoE switches?
Application scenarios for deploying IP surveillance cameras using PoE switches
Using PoE switches to deploy IP cameras can save time and network costs; at the same time, the installation location of IP cameras is not restricted by power sockets, making installation more flexible and convenient. Based on this, the cooperation mode of PoE switches and IP cameras has been widely used in various industries, such as home security monitoring to help users monitor property safety; traffic monitoring, which can remotely monitor the safety of railway stations, highways and airports; industrial monitoring, which can monitor Production process, warehouse management, etc. So, how to deploy IP cameras using PoE switches? Please follow JHA Technology to understand this issue.
How to deploy IP surveillance cameras using PoE switches?
No matter which type of PoE switch or IP camera you choose, the connection method and usage are basically the same. You can purchase the required monitoring equipment according to actual needs and install them in different locations. Here, we take the application of home security monitoring as an example to illustrate the connection steps of PoE switches and IP cameras in detail.
Step 1: Determine the installation location of the IP camera
Generally, in a home network, the installation height of an IP camera cannot be too low to prevent accidental damage; it cannot be too high to be inconvenient for maintenance. Therefore, it is recommended that the indoor installation height be higher than 2.5 meters, and the distance between the IP camera and the PoE switch should be controlled within 100 meters. When installing, please avoid strong light (such as sunlight, lighting, etc.) directly on the IP camera lens, otherwise it will easily cause excessive brightness or stretched light; and avoid installing the IP camera under a window, otherwise infrared reflection will cause surveillance video or pictures Overexposed.
Step 2: Install a fixed IP camera
After determining the installation location, drill holes in the location to install the IP camera. Make sure that the IP camera bracket is firmly and stable on the wall to prevent the image from shaking, and adjust the angle of the IP camera appropriately to obtain the best monitoring angle.
Step 3: Determine the installation location of the network cable used to connect the IP camera
After determining the installation location of the IP camera, drill a hole in a suitable location near it to embed the location of the network cable interface. If you need to install IP cameras on the higher second or third floor, please consider using the optimal cabling scheme, that is, the shortest distance between the installation point and the nearest network access point.
Step 4: Connect the IP camera to the PoE switch
After completing the first three steps, you need to connect your home IP surveillance system equipment next. A complete IP surveillance system usually consists of PoE switches, IP cameras, network video recorders (NVR, Network Video Recorder), surveillance display equipment (such as computers, TVs, etc.), and Ethernet cables. Figure 2 is a connection application between an 8-port PoE Gigabit switch and three IP cameras provided by FS. The specific connection steps are as follows:
*Plug the power cord into the power socket of the PoE switch and turn on the power;
*Use an Ethernet cable to connect the PoE switch and the router to ensure that the switch can access the Internet;
*Use an Ethernet cable to connect the IP camera to the PoE port of the PoE switch; the PoE switch supplies power to the IP camera through the Ethernet cable and performs data transmission;
*Use Ethernet cable to connect PoE switch and NVR, and use VGA or HDMI high-definition cable to connect NVR and monitoring display device. When connecting, please pay attention to use the corresponding interface.
Step 5: IP camera system settings
This is the last step in the installation process. IP cameras are shipped with application software or desktop management software. You can choose different functions such as real-time view, motion detection, video recording, etc. according to the software designation to meet your different monitoring needs.
After completing the above steps, the PoE switch and the IP camera are successfully connected, and the IP camera can work normally.
Post time: Apr-26-2021


